Today’s goals:
- Use CSS display values block, inline, and inline-block to create horizontal and vertical webpage menus
Today’s featured website:
- https://santatracker.google.com/village.html– Google’s holiday game site
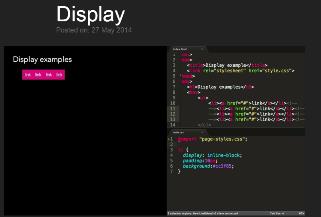
Key Concepts
- Menus are made up of bullets (list items) and links so we are using CSS to change their default styles.
- Bullets are block elements and links are inline elements. We change the display of these elements (either to block, inline, or inline block) so we can make them line up vertically or horizontally, depending upon the menu we want.
- We also add borders, padding, and background colors
Vertical Website Menu
- Website menus (or navigation bars) are simply lists (ul, li) of links (a).
- Let’s look at some examples here
- Let’s start a new webpage by adding opening and closing html, head, title, style, and body tags.
- Now add some list items (a.k.a bullets) that say Home, About, and Contact so we can begin building our first menu.
- Let’s get rid of the bullet circles by using list-style-type: none;. Add the ul selector in your style sheet (inside the style tags) and then add list-style-type: none; inside the curly brackets.
- Let’s style our ul further with background-color: gray;, padding: 0px;, margin: 0px; and a border: 2px solid navy;. Why does it take up the whole page (hint- think about whether bullets are block or inline elements)? What CSS property could we use to change this (hint- you’ve used it before and it has to do with size)? Let’s use the value 10%.
- Let’s also add line-height: 150%; to help make the menu more readable
- Now let’s add links to our menu around Home, About, and Contact.
- What type selector do we have to add to our CSS to begin styling the individual list items (Home, Contact, About)? How about the links inside of the list items? Hint: you can just combine the two selectors.
- To li a add padding: 8px 16px; and color: #000000; (what does this change?). What does that padding value do (look at your box model drawings for help)?
- We need to get rid of the automatic underlining of the links in the menu. What is the CSS property we use to add or remove links?
- Let’s add another link outside of the menu to our webpage. Will it be underlined? Why yes or why no?
- We have to change the display of li a because links are inline elements and we are using them inside of our list items. What should we change the display to, block or inline?
- We need to style our li element. Add li to your style sheet and let’s center the text (how?) and add only a border on the bottom (how?).
- Picky detail #1: let’s fix the double border between list items
- Picky detail #2: let’s highlight the menu items as our mouse rolls over them. We need to use a pseudo-class similar to a:hover (when we style links). Now that we’ve targeted it correctly, how about changing the background-color? Or adding a text-shadow?
Horizontal Website Menu
- Let’s comment out our style tags and then add new style tags below (we can keep all CSS this way) and comment out the other link we added to the HTML. Let’s also add HTML comments to label the CSS as horizontal menu and vertical menu.
- Let’s add ul to our style sheet with list-style-type: none; margin: 0px; padding 0px; text-align: center; and background-color: lightblue;
- Let’s add li to our style sheet and change the display from block to inline (why?)
- Let’s also add padding: 8px 16px; under li and line-height: 40px; and height: 40px;.
- We need to style the links inside our menu. Add a with curly brackets { } to the style sheet below li. Add text-decoration: none; to remove the underline. Add padding: 10px;. We must add display. Here is where inline-block comes in handy. Adding display: inline-block; to our links means we can have them line up next to each other while also styling them to look like a menu.
- Finally, let’s change the background-color on hover
- Let’s take another look at these examples. There are several ways to create different vertical and horizontal website menus. These go beyond the basic stuff we just did.
- Finally, let’s look at how to create a drop-down menu